Overview
This tutorial blog highlights how H2O AI Cloud (HAIC) lets novice and expert data scientists build state-of-the-art machine learning (ML) models by supporting crucial parts of the machine learning life cycle. In particular, this tutorial utilizes H2O Hydrogen Torch and other HAIC applications to build, deploy, and score a state-of-the-art image classification model. This model is capable of determining whether an image depicts a car or coffee (or a cup of coffee). The following applications are utilized:
![]()
| Application | How this tutorial uses the application | Details of the application |
|---|---|---|
| H2O Label Genie (v0.3.0) | To label (prepare) the data for the image classification model | H2O Label Genie expedites the process of labeling data by utilizing zero-shot learning models |
| H2O Hydrogen Torch (v1.3.0) | To build the image classification model |
|
| H2O MLOps (v0.60.1) | To deploy the image classification model | Built H2O Hydrogen Torch models can be deployed to H2O MLOps right from the H2O Hydrogen Torch UI |
Objectives
- Discover one of the many avenues you can utilize H2O AI Cloud (HAIC) to generate an end-to-end pipeline to develop state-of-the-art machine learning models
- Understand/highlight the ecosystem of the HAIC that supports and lets novice and expert data scientists build deep learning models at any stage of the machine learning life-cycle
- Build a state-of-the-art image classification model capable of determining whether an image depicts a car or coffee (or a cup of coffee)
- Understand how H2O Label Genie, H2O Hydrogen Torch, and H2O MLOps work together to generate and support state-of-the-art machine learning models for production
Prerequisites
- Access to H2O AI Cloud (HAIC) that includes:
- H2O Label Genie v0.3.0
- H2O Hydrogen Torch v1.3.0
- H2O MLOps v0.60.1
To request a demo of H2O AI Cloud (HAIC), see H2O AI Cloud (HAIC).
Background: Machine learning models in production and the need for H2O AI Cloud
The machine learning life cycle can result in many complications when considering time constraints, especially during production or prototyping. In particular, three major complications prevent the expedited development of state-of-the-art machine learning models for production:
- The need to label huge amounts of data
- The requirement to train an array of models to discover appropriate hyperparameter values
- The desire/need to have a central and informative platform (location) to deploy models to production
H2O AI Cloud (HAIC) has created an ecosystem of applications, models, and AI engines that enable novice and expert data scientists to build state-of-the-art machine learning (ML) models while eliminating major complications around machine learning development and deployment. To learn more, see H2O AI Cloud.
Action plan
The following steps highlight H2O AI Cloud and allow you to build, deploy, and score an image classification model that is capable of determining whether an image depicts a car or coffee (or a cup of coffee):
- Step 1: Label data with H2O Label Genie
- Step 2: Build model with H2O Hydrogen Torch
- Step 3: Deploy model utilizing H2O MLOps
Step 1: Label data with H2O Label Genie
You need label data to create a model capable of determining whether an image depicts a car or coffee (or a cup of coffee). In particular, the label data you need are images depicting a car or coffee (or a cup of coffee). A demo dataset of the images you need for this tutorial already exists in H2O Label Genie. H2O Label Genie will then help you expedite the normally time-consuming task of labeling this collection of images.
H2O Label Genie is an application that enables you to annotate your data for a large set of annotation tasks in computer vision (CV), natural language processing (NLP), and audio. H2O Label Genie enables you to generate annotated datasets supported in H2O Hydrogen Torch.
To proceed with this tutorial, first access H2O Label Genie v0.3.0 (in HAIC). To learn how to access H2O Label Genie, see Access H2O Label Genie.
Step 1.1: Explore unlabeled dataset
You will train your model with the car-or-coffee-demo unlabeled out-of-the-box demo dataset in H2O Label Genie. This dataset contains 40 images, each depicting a car or coffee (or a cup of coffee). Now, explore the dataset.
- On the H2O Label Genie navigation menu, click Datasets.
- In the datasets table, click car-or-coffee-demo.
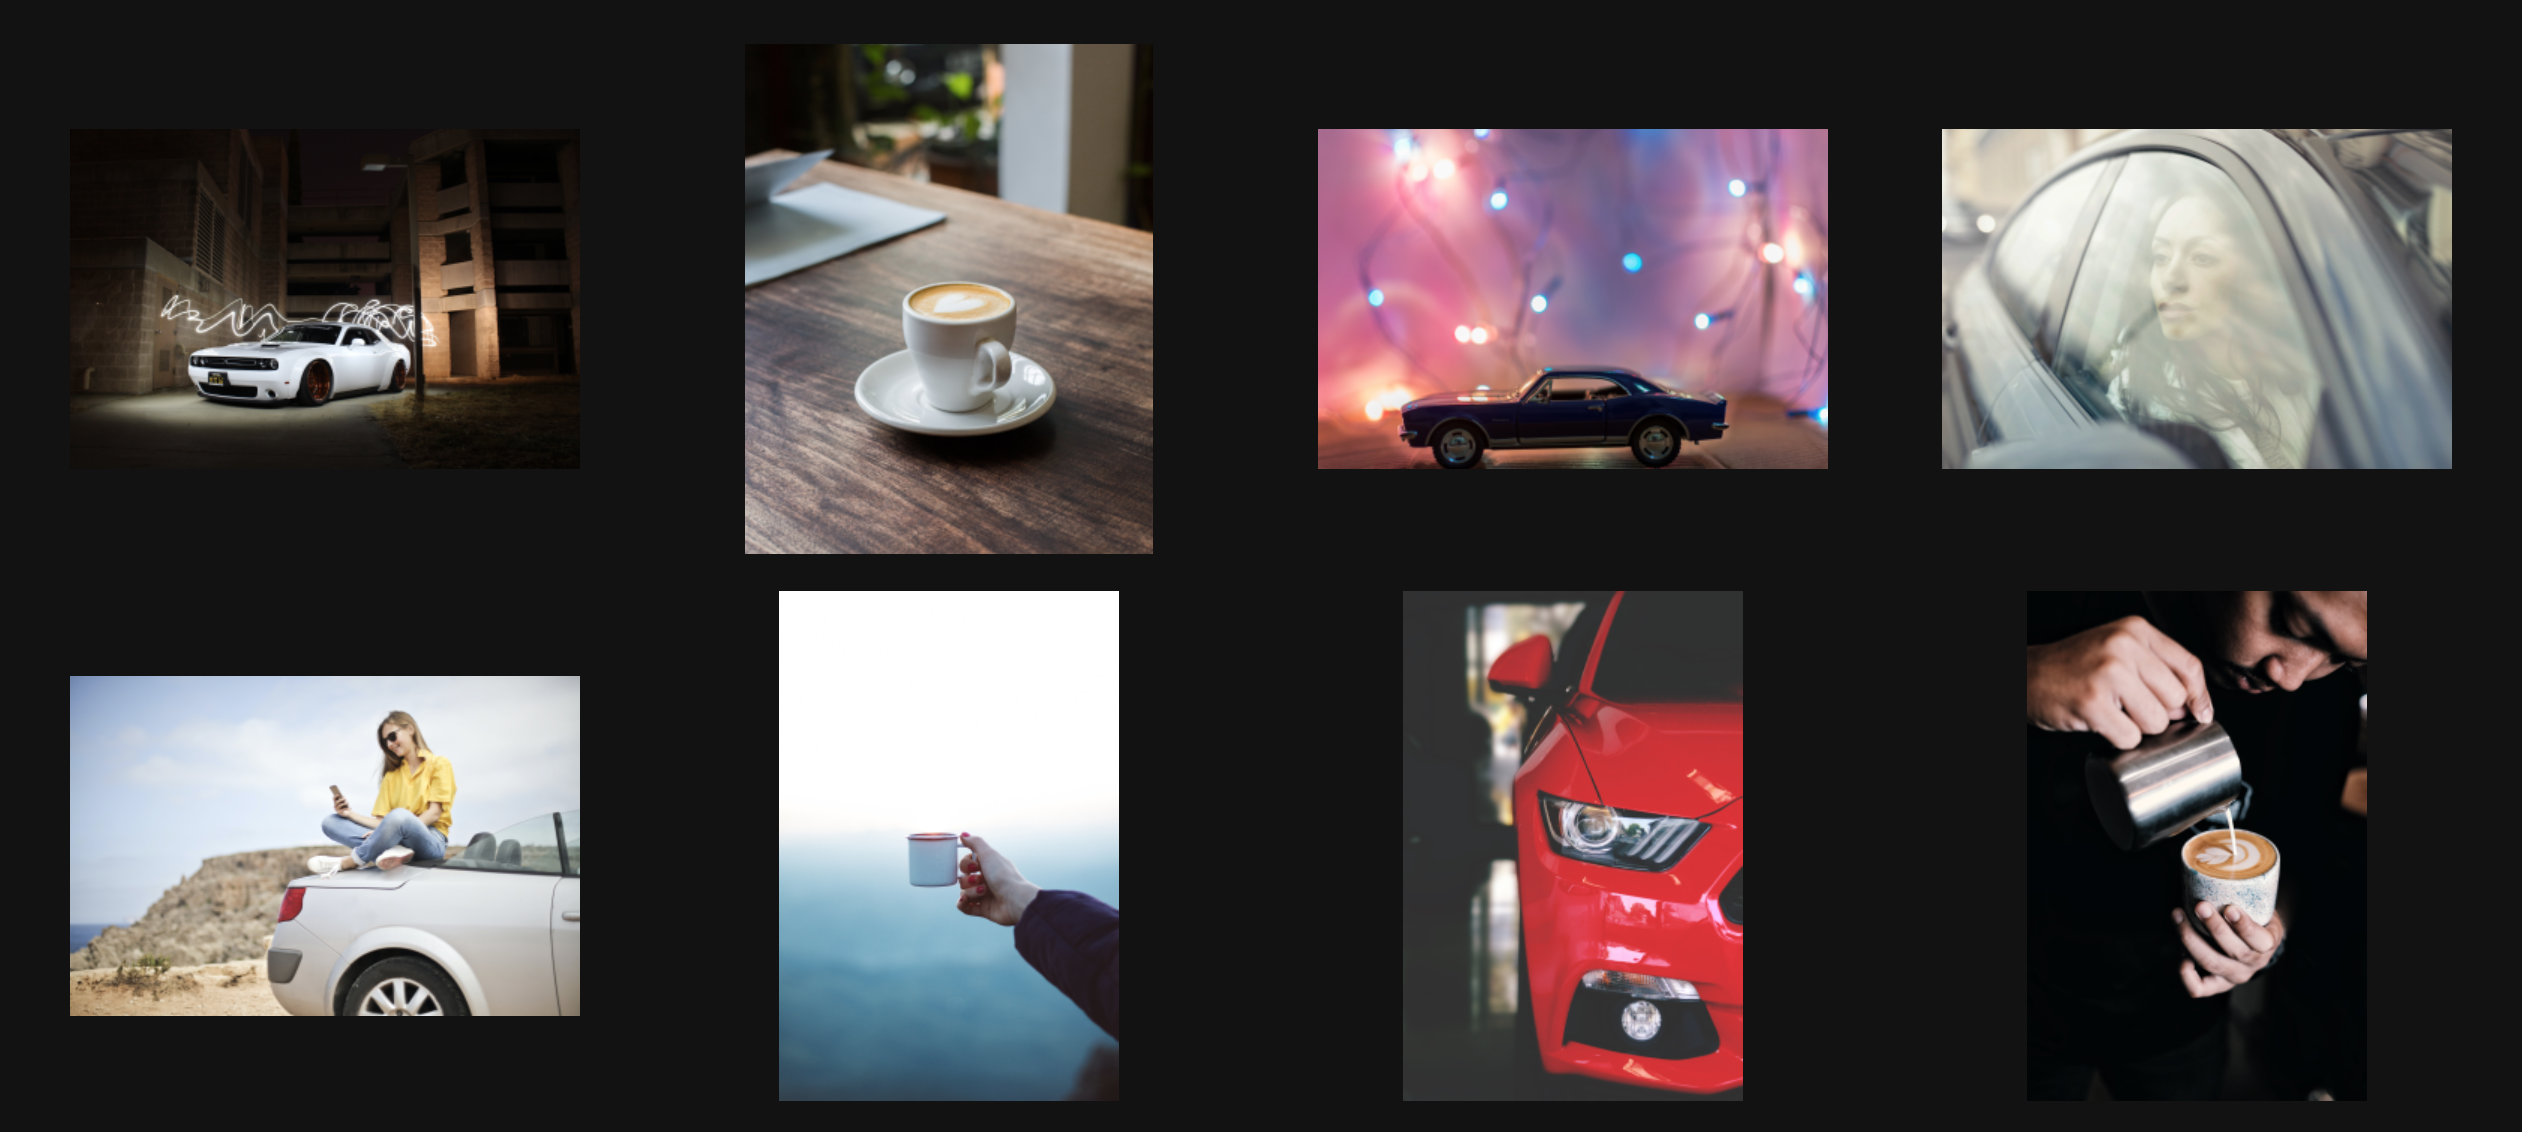
You can see here that the dataset contains images of cars or coffee (or a cup of coffee).
Step 1.2: Create annotation task
Now that you have seen the dataset, you will create an annotation task that will let you annotate the dataset. An annotation task refers to the process of labeling data. For this tutorial, an image classification annotation task refers to assigning one categorical target label to an input image. Create an annotation task.
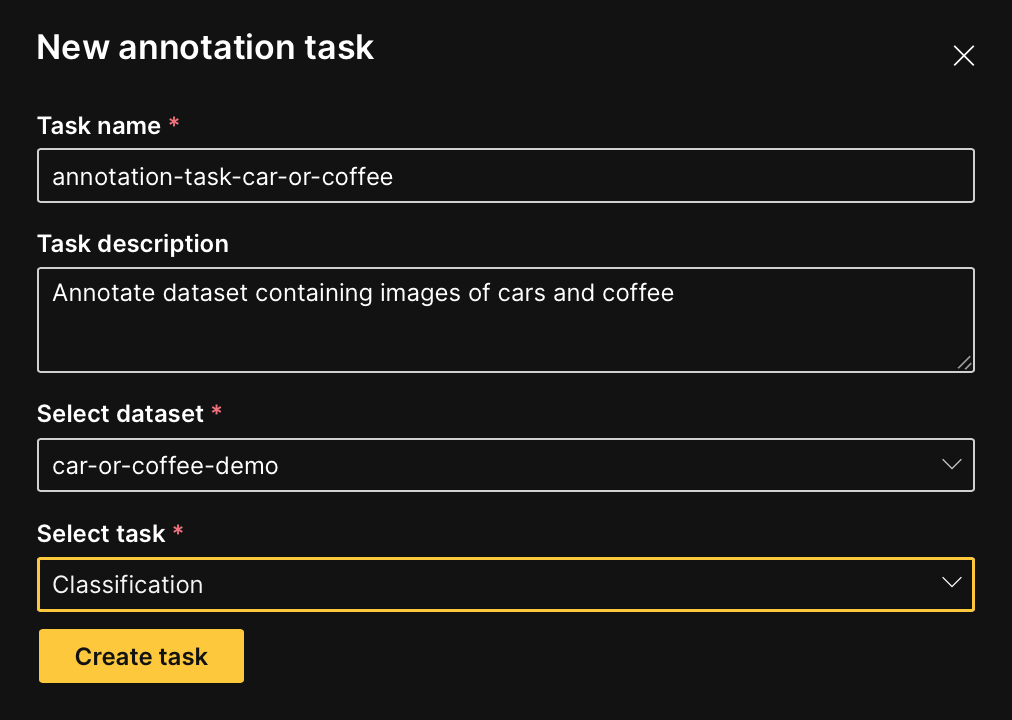
- Click New annotation task.
- In the Task name box, enter
annotation-task-car-or-coffee. - In the Task description box, enter
Annotate dataset containing images of cars and coffee. - In the Select task list, select Classification.
- Click Create task.
Step 1.3: Specify annotation task rubric
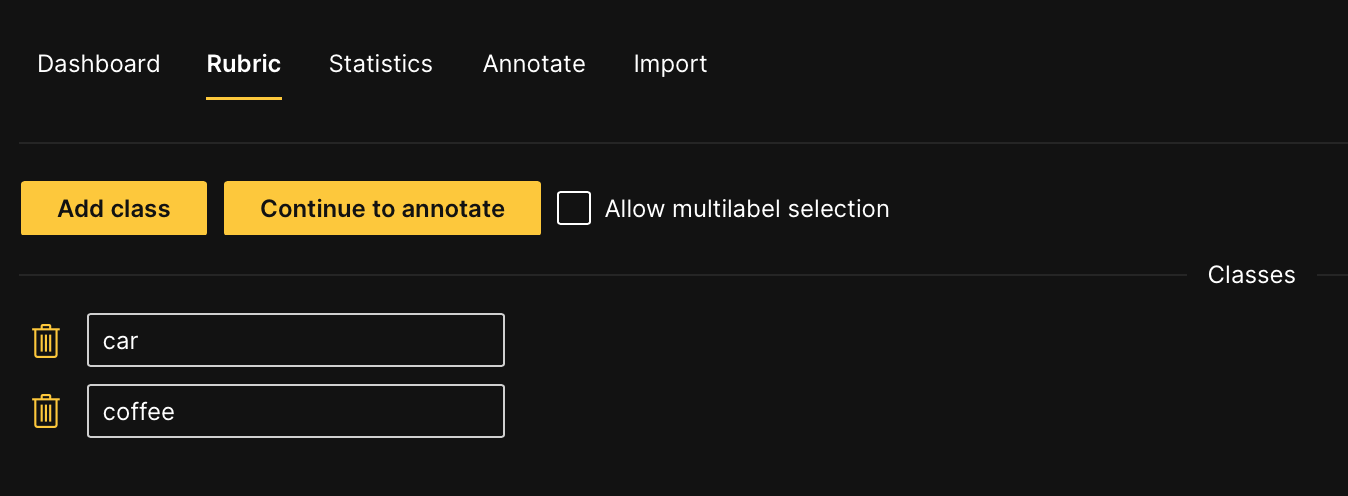
Before you can start annotating your dataset, you need to specify an annotation task rubric (within the created annotation task). An annotation task rubric refers to the labels (e.g. object classes) you want to use when annotating your dataset. For this dataset, there are two labels you want to specify: Car and Coffee. Define the annotation task rubric.
- In the Class name box, enter
car. - Click Add class.
- In the new Class name box, enter
coffee. - Click Continue to annotate.
Step 1.4: Annotate dataset
Now that you have specified the annotation task rubric, annotate the dataset.
- Click Continue to annotate.note
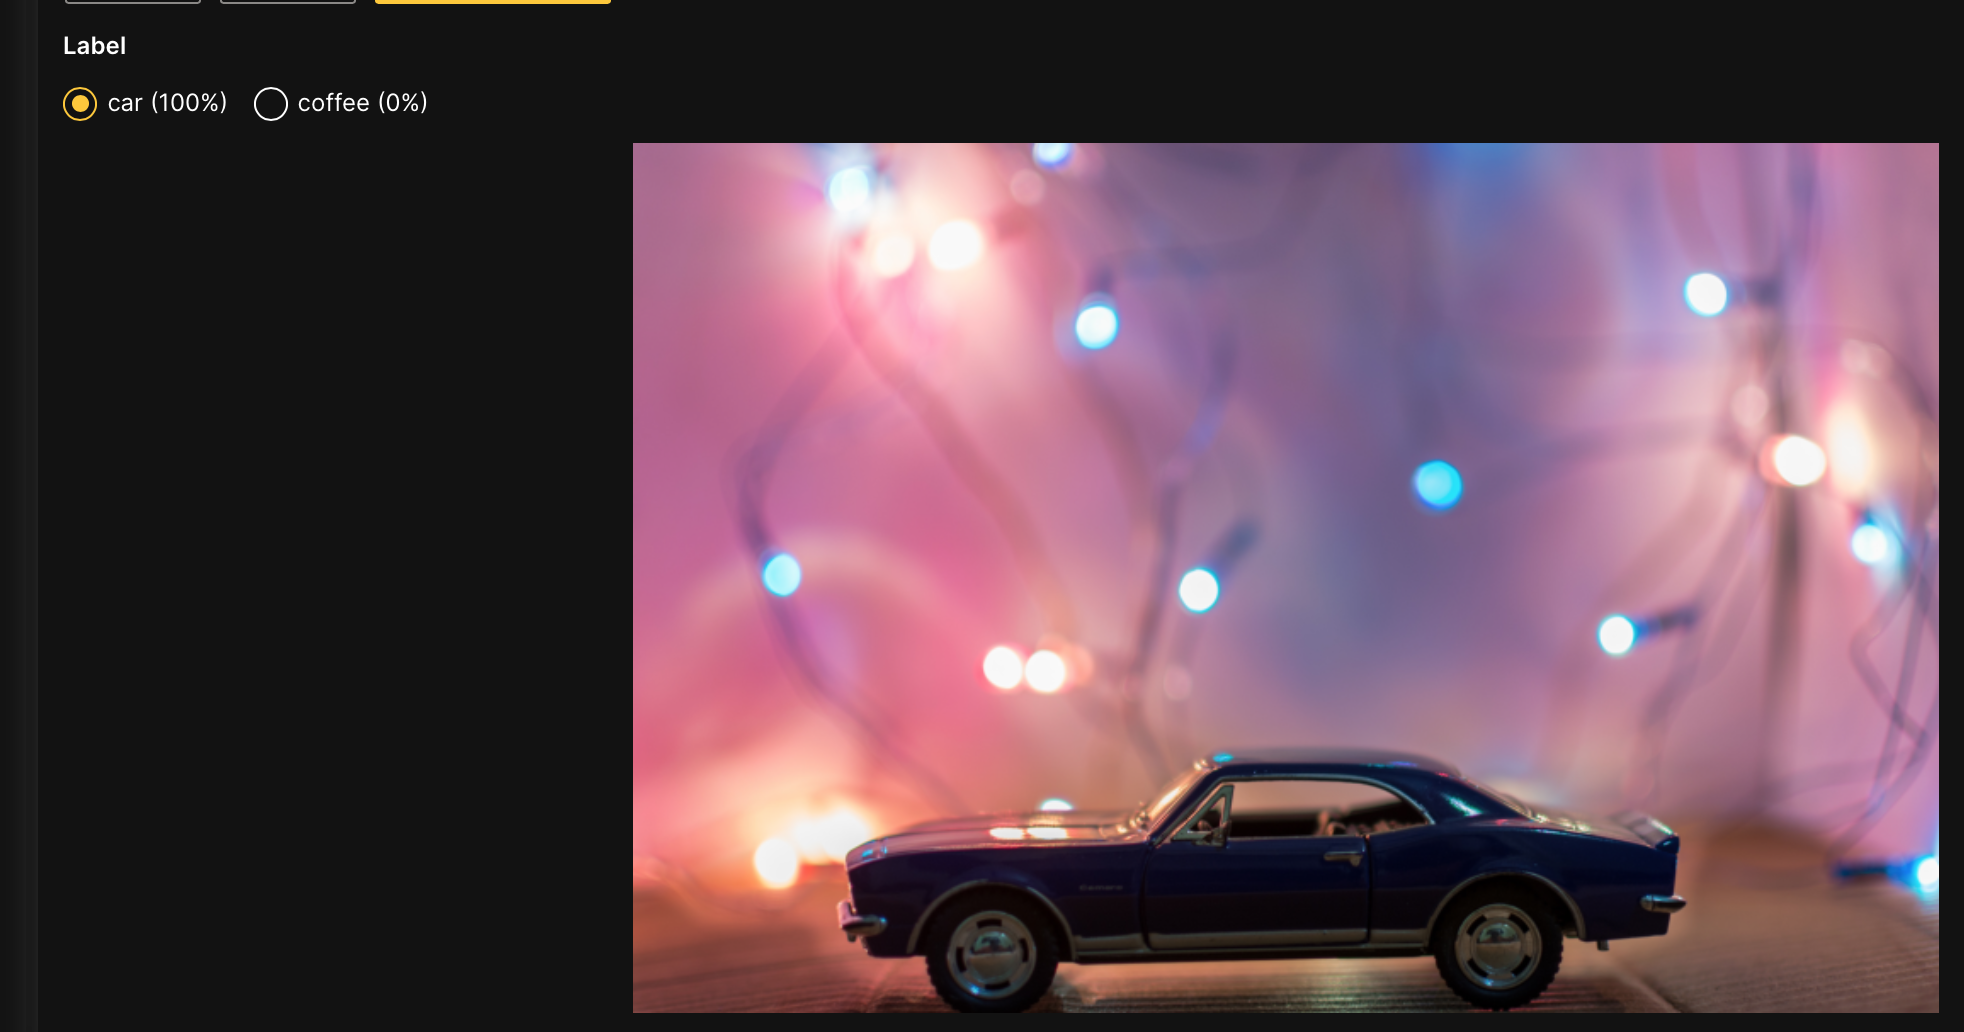
In the Annotate tab, you can individually annotate each image in the dataset. Select which label to use depending on whether the image depicts a car or coffee (or a cup of coffee).
- To select the
carorcoffeelabel: Select coffee (N%) or car (N%). - A zero-shot learning model is On by default when working with an image classification annotation task. Smart annotation shows you how to turn off the zero-shot learning model.
- To select the
- Click Save and next after annotating each image. note
- Save and next saves the annotated image
- To skip an image to annotate later: Click Skip.
- Skipped images (samples) reappear after all non-skipped images are annotate
Step 1.5: Download annotated dataset
After annotating (labeling) all the images, the following prompt appears letting you download the annotated dataset in a format that H2O Hydrogen Torch supports:
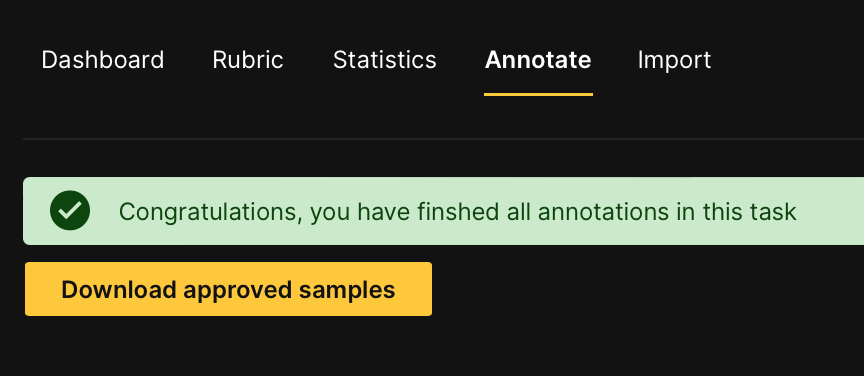
- In the Annotate tab, click Download approved samples.note
- H2O Label Genie then downloads the following zip file:
annotation-task-car-or-coffee_image_classification.zip.This file contains the annotated dataset that H2O Hydrogen Torch supports.- See Downloaded dataset formats: Image regression to learn about the structure of the zip file.
- H2O Label Genie then downloads the following zip file:
Step 2: Build model with H2O Hydrogen Torch
Next, you will utilize H2O Hydrogen Torch to build an image classification model with the dataset you downloaded from H2O Label Genie.
H2O Hydrogen Torch is an application that enables novice and expert data scientists to build deep learning models for a large set of diverse problem types in computer vision, natural language, and audio. No code is required.
H2O Hydrogen Torch enables you to generate good models with default hyperparameter values derived from best model training practices used by top Kaggle grandmasters. In addition, you can tune default hyperparameter values to obtain the best state-of-the-art deep learning models. Simple and interactive charts in H2O Hydrogen Torch enable you to understand the impact of selected hyperparameter values on the training process. For model deployment, you can deploy built models in the H2O Hydrogen Torch UI, external Python environments, or directly to H2O MLOps.
H2O Hydrogen Torch optimizes and simplifies training deep learning models by streamlining the training process.
To proceed with this tutorial, first access H2O Hydrogen Torch v1.3.0 (in HAIC). To learn how to access H2O Hydrogen Torch, see Access H2O Hydrogen Torch.
Step 2.1: Import downloaded annotated dataset
Import the downloaded annotated dataset to H2O Hydrogen Torch:
- In the H2O Hydrogen Torch navigation menu, click Import dataset.
- In the Source list, select Upload.
- Upload the
annotation-task-car-or-coffee_image_classification.zipfile (downloaded annoated dataset).noteThe Upload data connector requires the data for an image classification experiment to be in a zip file.
- Click Upload. note
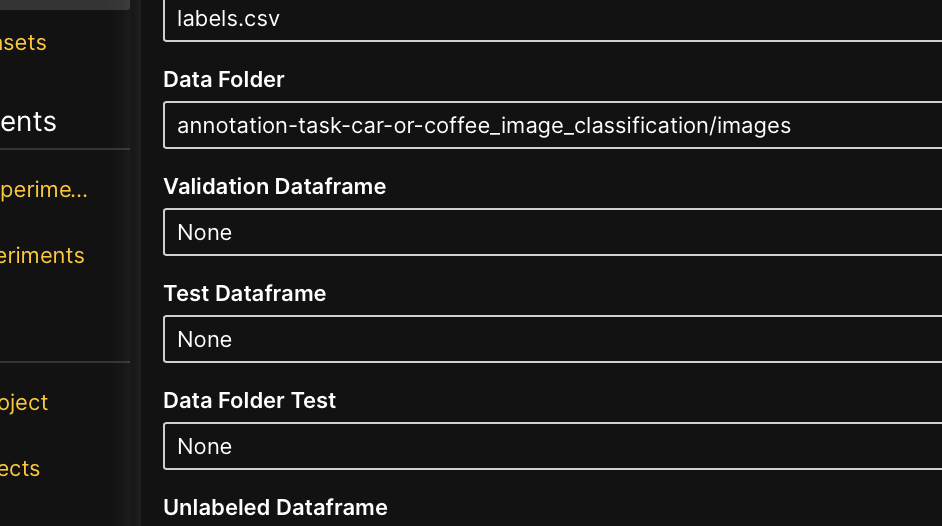
After importing a dataset, H2O Hydrogen Torch automatically defines the dataset settings by exploring the content of the imported dataset. Before saving the defined settings, you can modify an incorrect value or option given to a dataset.
- In the Data folder list, select annotation-task-car-or-coffee_image_classification/images.
- In the Data folder test list, select None.
- Click Continue.
- Again, click Continue.
Step 2.2: Build model (experiment)
Build your image classification model.
- In the H2O Hydrogen Torch navigation menu, click Create experiment.
- In the Dataset list, select annotation-task-car-or-coffee_image_classification. note
After selecting the dataset, H2O Hydrogen Torch displays settings for an image classification experiment (model) where it:
- Autodetects the dataset type and displays the appropriate settings
- Defines each setting with a default value for all available settings for an image classification model (while considering model training best practices used by top Kaggle grandmasters)
- In the Experiment name box, enter
model-car-or-coffee. - Click Run experiment.
Step 2.3: Observe running experiment (model)
H2O Hydrogen Torch offers several simple and interactive charts that enable you to understand the impact of selected hyperparameter values on the training process (during and after model training). In this case, you can observe the default utilized hyperparameter values. Observe the charts as the experiment (model) is trained.
In the experiments table, click model-car-or-coffee.
tipIf you do not see the charts, wait a few seconds before you click Refresh.
The charts are rendered and populated as the experiment (model) is trained and training metrics are obtained.
The default metric to evaluate your model is AUC_ROC (area under the receiver operating characteristic curve). The closer the AUC_ROC value is to 1, the better the model determines whether an image depicts a car or coffee (or a cup of coffee).

Step 2:4: Observe completed experiment (model)
After a few minutes, you can observe the completed experiment (model).
- In the H2O Hydrogen Torch navigation menu, click View experiments.
- In the experiments table, locate experiment model-car-or-coffee. note
H2O Hydrogen Torch indicates that an experiment is complete when its status changes to Finished (in green).
- Click the Summary tab.
Observe the experiment's final validation metric in the Val metric row. Not bad.
Step 3: Deploy model utilizing H2O MLOps
Now that you built your model, you can utilize H2O MLOps to deploy and score the image classification model.
H2O MLOps is an open, interoperable platform for model deployment, management, governance, monitoring, and alerting that features integration with H2O Driverless AI, H2O-3 open source, and third-party models.
Within H2O Hydrogen Torch, you can deploy a built model directly to H2O MLOps. This allows you to avoid downloading the model's H2O MLOps pipeline which you then later have to upload to H2O MLOps.
From H2O Hydrogen Torch you can also:
- Access the deployed model's H2O MLOps endpoint URL to score the model
- Obtain a sample request (Python code) that you can utilize to score from any Python environment
Step 3.1: Deploy model to H2O MLOps (in H2O Hydrogen Torch)
Deploy the built model to H2O MLOps from within H2O Hydrogen Torch.
- Click the Deployments tab.
- In the Project box, enter
model-car-or-coffee.noteTo learn about H2O MLOps projects, see Understand projects in H2O MLOps.
- In the Runtime list, select python-scorer_hydrogen_torch_gpu_38_120.
- Click Deploy.
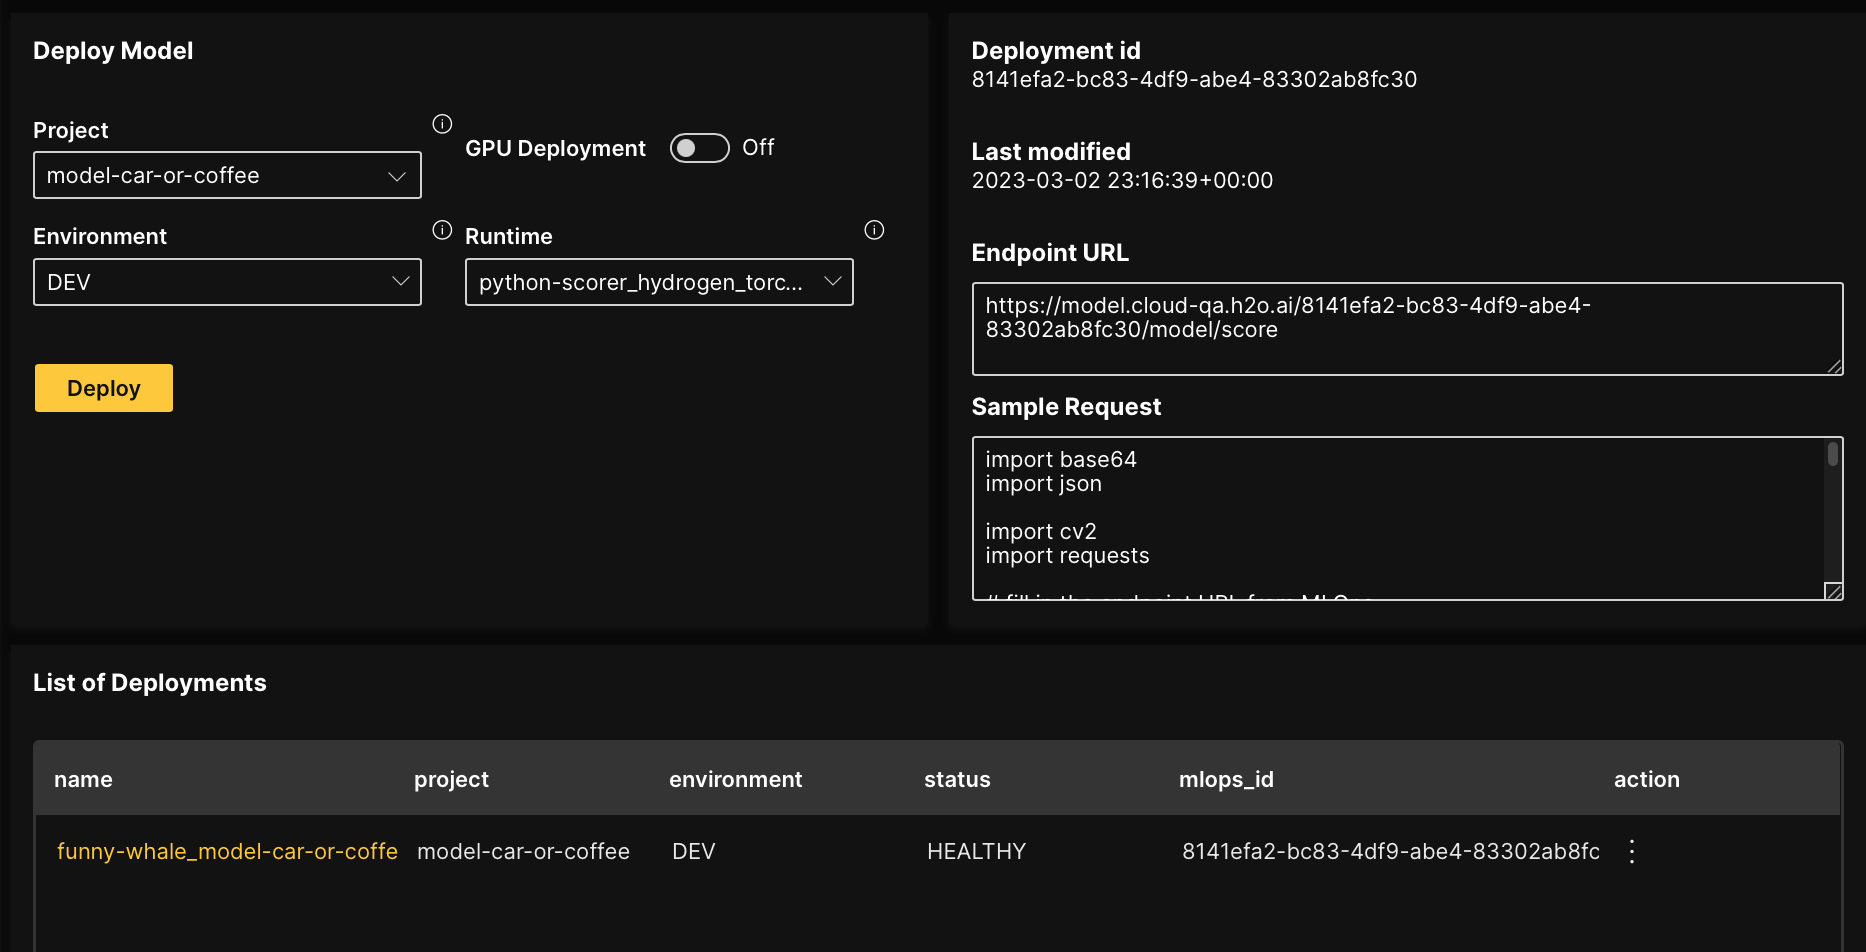
After the deployed model achieves a HEALTHY status (the deployment is alive and healthy), you can view certain deployment pieces of information (for example, endpoint URL) to score the model.
To learn about the different deployment states a model can be in, see States.
Step 3.2: Score new data (H2O MLOps endpoint URL)
Now that you have deployed the model to H2O MLOps, you can use the endpoint URL of the deployed model to score new data. In particular, you can use the offer sample request. For the purpose of this tutorial, score the following image:
- Save the
coffee.pngimage. - In the List of deployments table, click *_model-car-or-coffee_dev.
- Create a Python environment with the following commands:
python3 -m venv venv
source venv/bin/activate - Within your Python environment, create the following file:
sample-request.py. - In the Sample request box (in the Deployments tab), copy and paste the provided Python code to the
sample-request.pyfile. - Move the
coffee.pngimage to the same directory where the Python environment was created. - Make the following modifications to the
sample-request.pyfile:- Modify line 11 to the following:
img = cv2.imread("coffee.png"). - Click enter to move to line 12 which should now be empty.
- Paste the following into line 12:
img = cv2.resize(img, (1024,1024)).
- Modify line 11 to the following:
- After all specified modifications, you should have the following:
import base64
import json

import cv2
import requests

# fill in the endpoint URL from MLOps
URL = "https://model.cloud-qa.h2o.ai/8141e....3302ab8fc30/model/score"

# if you want to score an image, please base64 encode it and send it as string
img = cv2.imread("coffee.png")
img = cv2.resize(img, (1024,1024))
input = base64.b64encode(cv2.imencode(".png", img)[1]).decode()

# in case of a multi-channel numpy array, please json encode it and send it as string
# img = np.load("image.npy")
# input = json.dumps(img.tolist())

# json data to be sent to API
data = {"fields": ["input"], "rows": [[input]]}

# post request
r = requests.post(url=URL, json=data)

# extracting data in json format
ret = r.json()

# read output, output is a dictionary
ret = json.loads(ret["score"][0][0])
print(ret)
- Run the following in your Python environment:
python3 sample-request.py
After running the sample-request.py file, the following predictions are returned:
{'predictions': [[0.26533323526382446, 0.7346667647361755]], 'labels': [['label_car'], ['label_coffee']]}
From the returned predictions, you see that the model generated a high probability ([label_coffee], [0.734]) that the image depicts coffee, which is correct.
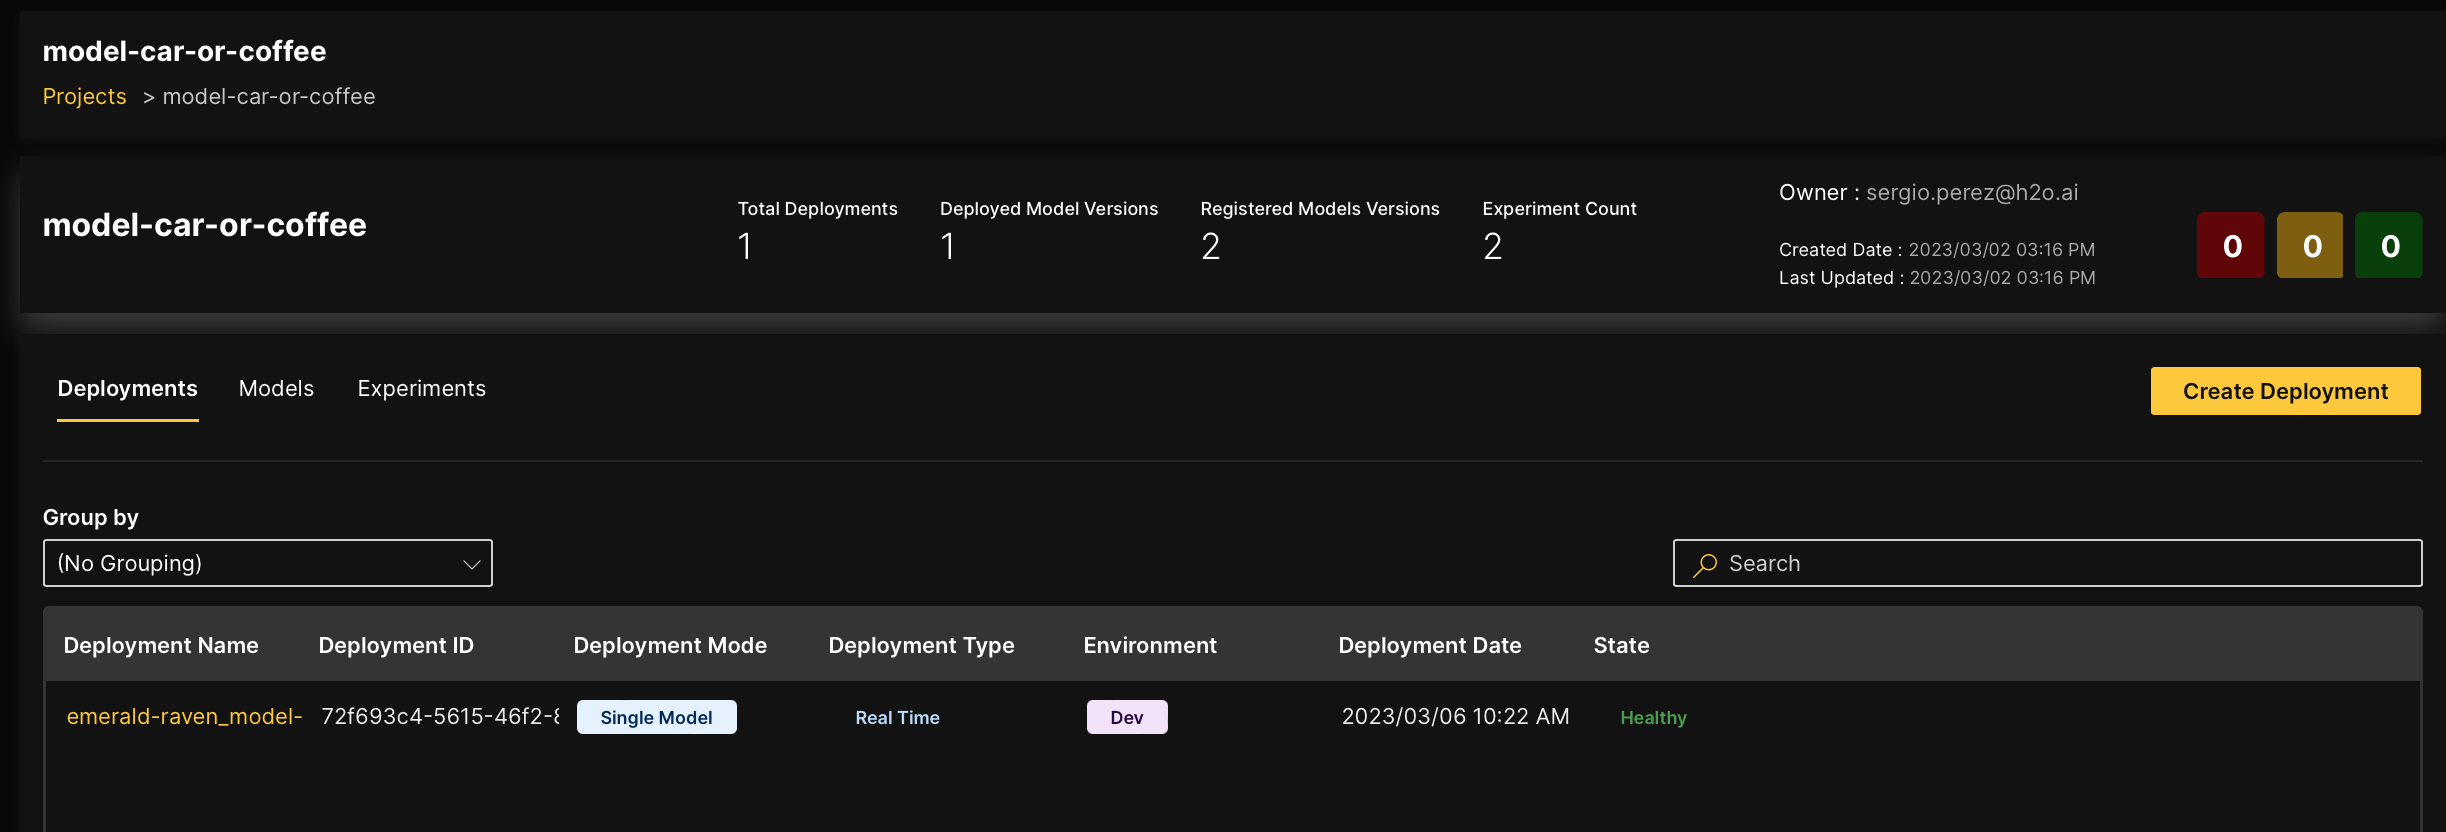
Step 3.3: View deployed model in H2O MLOps
All H2O Hydrogen Torch models that are deployed to H2O MLOps are stored in H2O MLOps (within the specified project).
To view your deployed model in H2O MLOps, first access H2O MLOps v0.60.1 (in HAIC). To learn how to access H2O MLOps, see Get started.
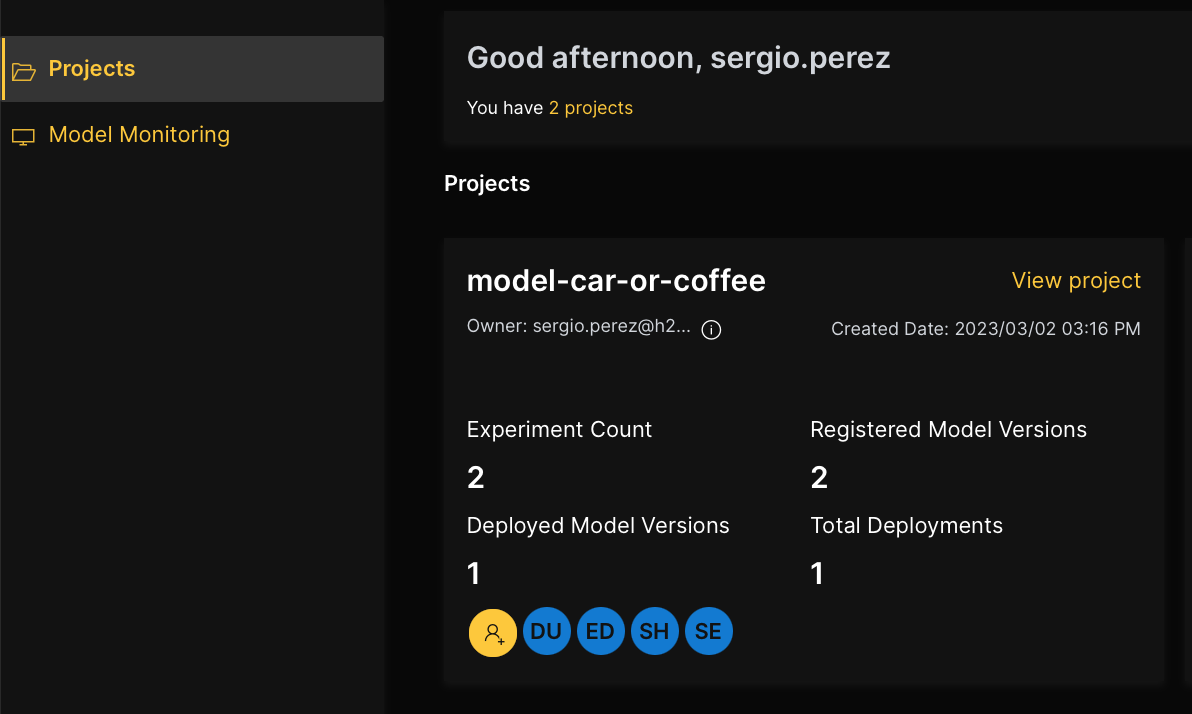
- In the H2O MLOps navigation menu, click Project.
- In the model-car-or-coffee card, click View project.
Summary
This tutorial explored how H2O AI Cloud (HAIC) lets novice and expert data scientists build state-of-the-art machine learning (ML) models by supporting crucial parts of the machine learning life cycle. In particular, this tutorial utilized multiple HAIC applications to build, deploy, and score a state-of-the-art image classification model which could determine whether an image depicted a car or coffee (or a cup of coffee).